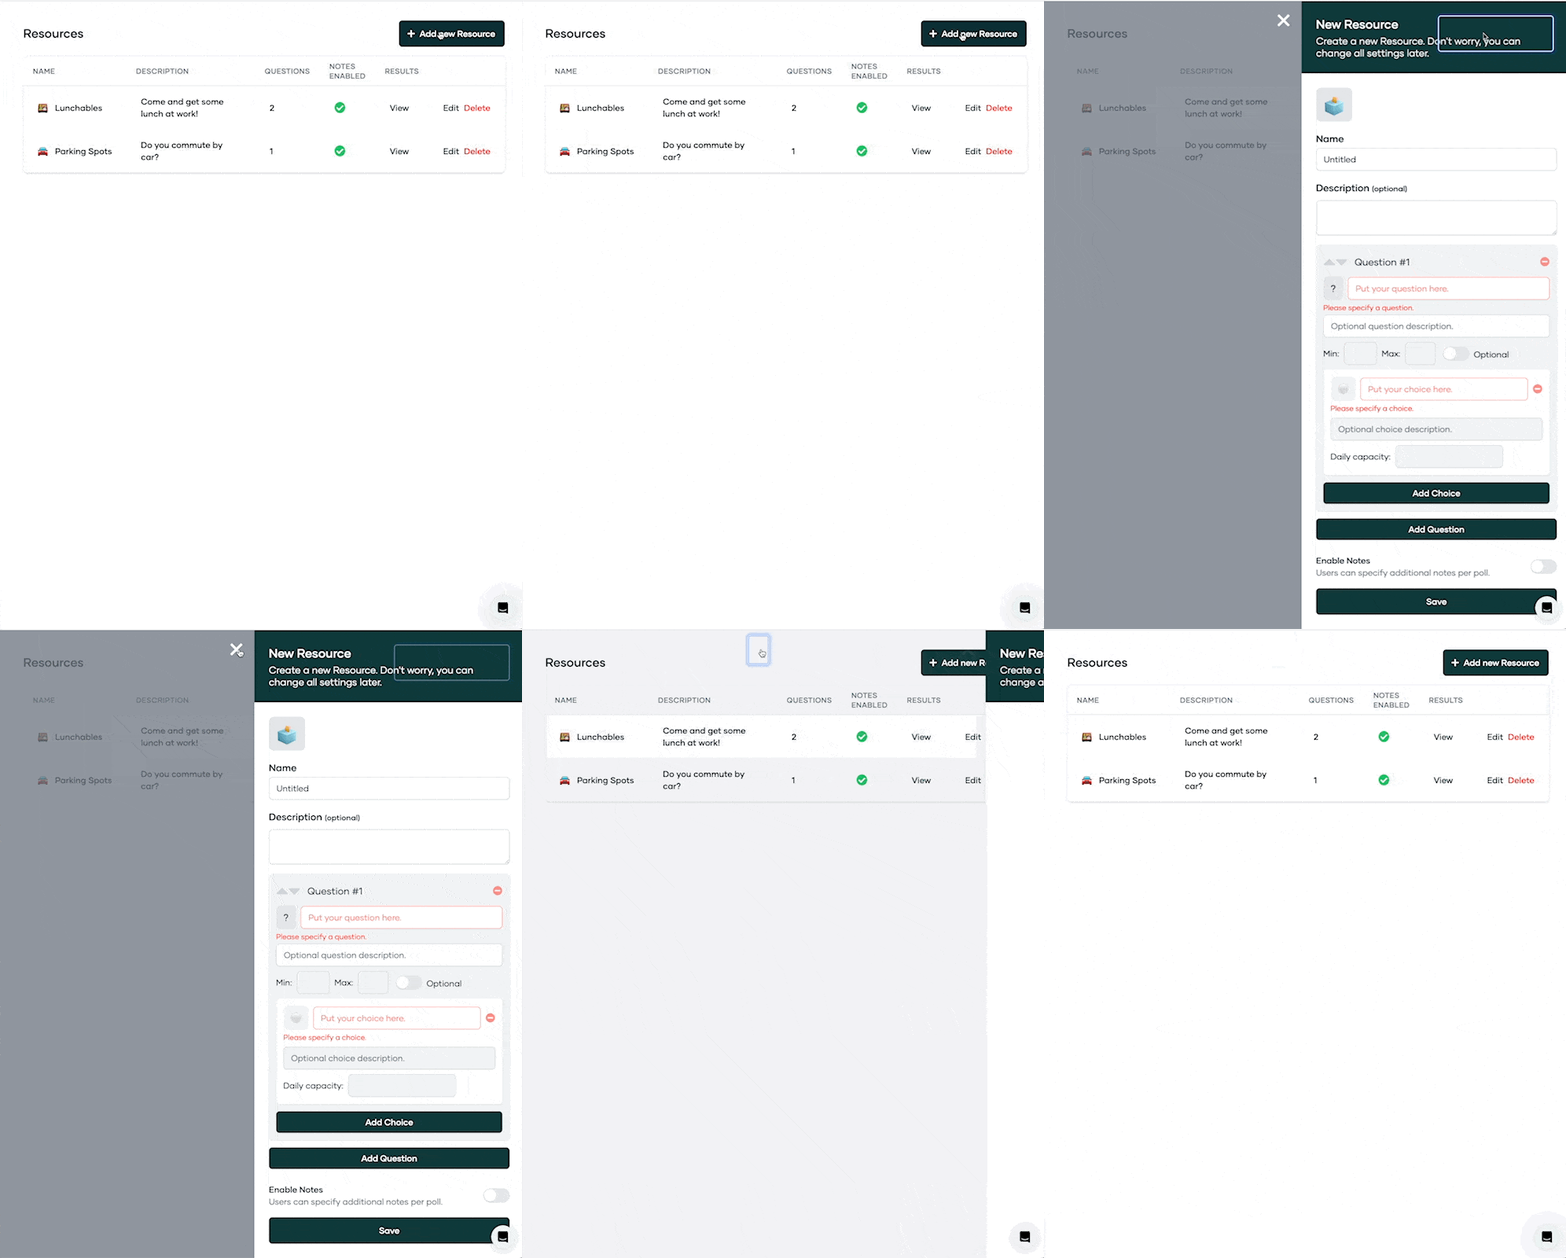
Creating a new resource within our app is straightforward and flexible
This guide will walk you through the process of adding a new resource to the Resources section.
💡Note: Resources can be used in many ways – such as office dogs, lunch menu pricing, training sign-ups, or ordering office supplies. The more creatively resources are used, the more valuable the app becomes for everyday office life.

Create a New Resource
-
Navigate to the Resources section of the app.
-
Click on the
Add new Resourcebutton at the top of the page. -
You will be presented with a form to create your new resource. Don't worry, you can change all these settings later.
Fill in the Resource Details
-
Name: Enter the name of your new resource where it says "Untitled". This could be anything relevant to your organization, like "Office Supplies" or "Survey 1".
-
Description (optional): You have the option to add a brief description of the resource. This could provide additional details or context about the resource.
How to add questions to a resource (for more details when booking a resource)
Adding Questions
-
Question #1: In the space where it says "Put your question here", type the first question you'd like to associate with this resource. This could be a question for users to answer when they interact with the resource.
-
Optional question description: This field allows you to add more detail or context to your question.
-
Min and Max: These fields allow you to set a minimum and maximum limit for the answer to the question. This is especially useful for numerical questions.
Adding Choices
-
Optional: If your question requires choices (like in a multiple-choice question), toggle the "Optional" switch on, and then put your choice in the field that says "Put your choice here".
-
Optional choice description: This field allows you to add more detail or context to your choice.
-
Daily capacity: This field allows you to set a limit for the choice. For example, if you're asking about lunch preferences, you might set a daily capacity for each choice to reflect the number of each meal available.
-
Add Choice: Click this button to add the choice to your question. You can add multiple choices to each question.
-
Add Question: Click this button to add more questions to your resource. You can add as many questions as you need.
Enable Notes
-
Enable Notes: Toggle this switch on if you want users to be able to add notes or comments when they interact with this resource. The note says "Users can specify additional notes per poll".
-
Once you've filled out all the details for your new resource, click the
Savebutton at the bottom of the page. Your new resource will now appear in the Resources section.
Remember, you can always come back and edit your resource later if you need to change anything.
If you need further assistance or have any questions, please contact our support team.
