Okta SSO
Last updated: October 21, 2025
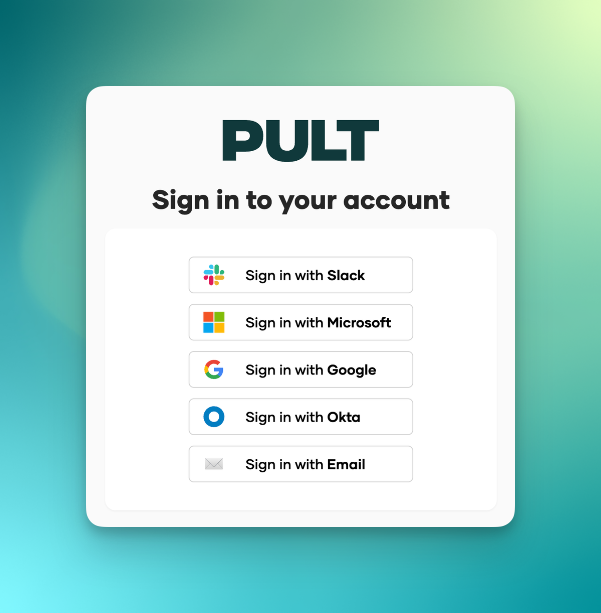
This article will guide you through the steps to enable your employees to sign in to Pult using Okta.
Before setting up Okta SSO, ensure that Okta Sync is properly configured. This is a crucial prerequisite for the Okta SSO integration process.
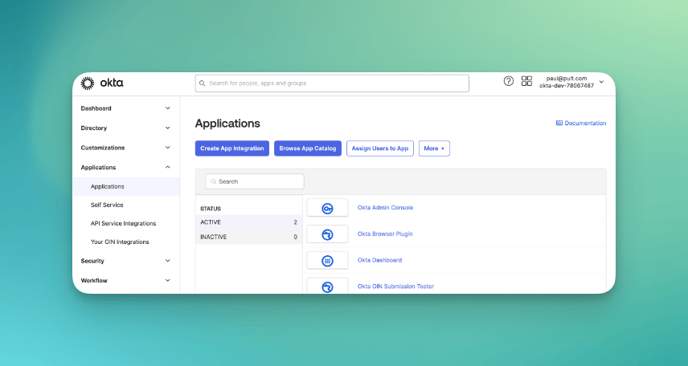
Use an admin account in your Okta tenant to set-up the required “Pult SSO” app.
Navigate to Admin -> Applications (https://-admin.okta.com/admin/apps/active)
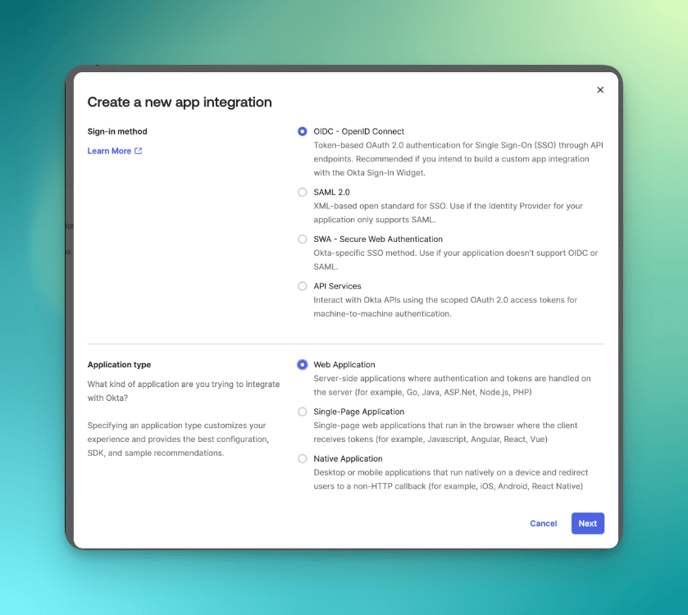
Click on Create App Integration. Select OIDC - OpenID Connect as Sign-in method and Web Application as application type. Then click Next.
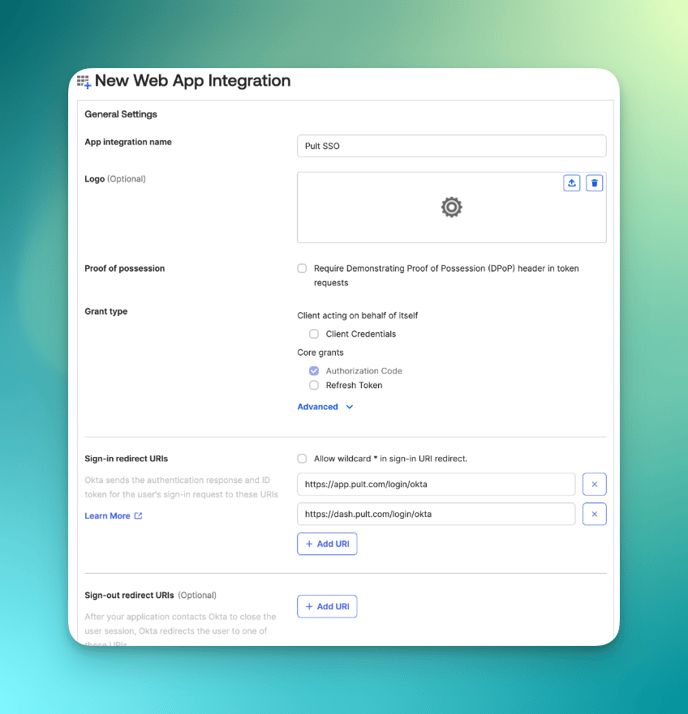
Make sure that the following options match the one on your screen and click Save:
App Integration Name
Pult SSO
Proof of possession
[ ]
Grant type
[X] Authorization code
Sign-in redirect URLs
- https://app.pult.com/login/okta
-https://dash.pult.com/login/okta
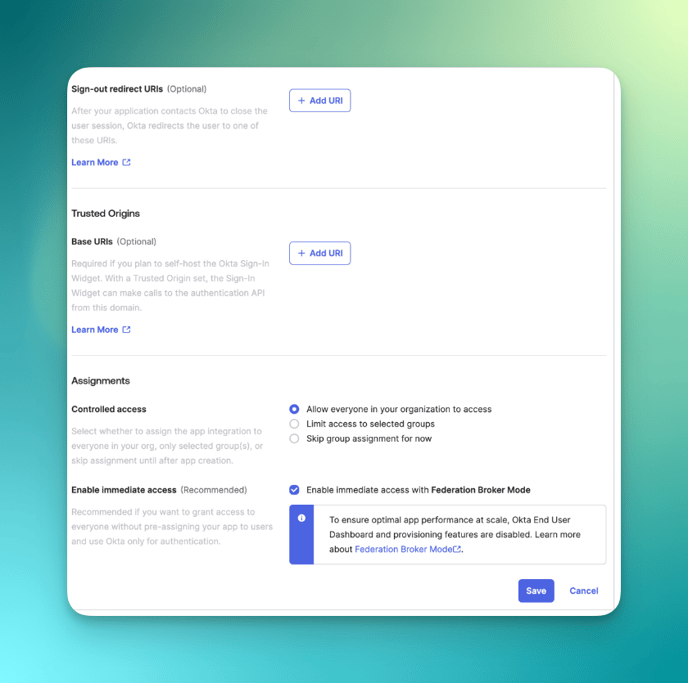
Assignments
[X] Allow everyone in your organization to access
[X] Enable immediate access with Federation Broker Mode
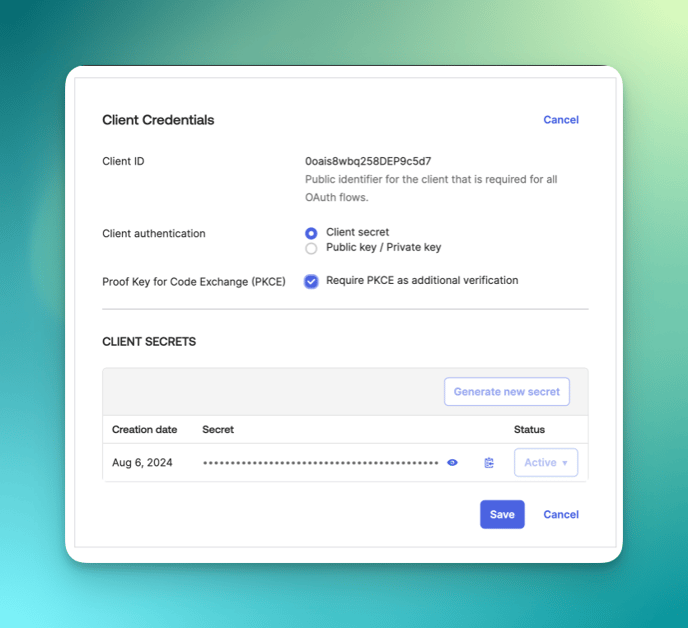
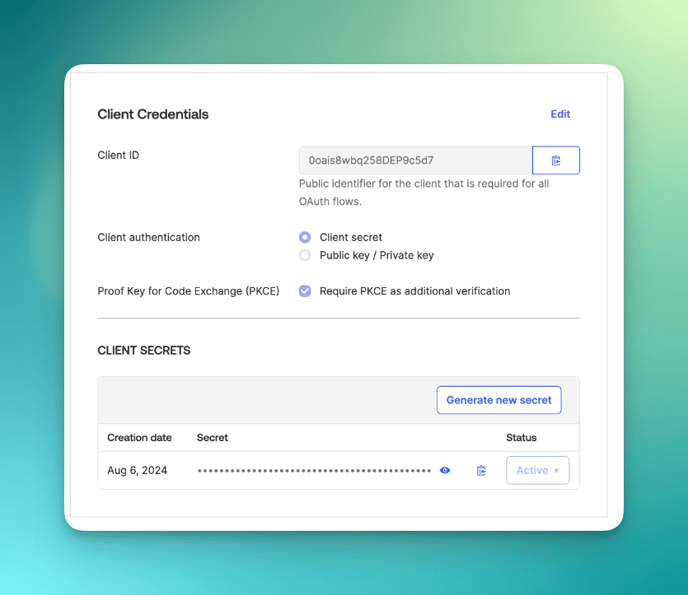
After you’ve created the App, enable the Require PKCE as additional verification option:
Go to the tab Okta API Scopes and enable the following scopes:
- okta.users.read.self
- okta.myAccount.profile.read
- okta.myAccount.organization.read
- okta.myAccount.email.read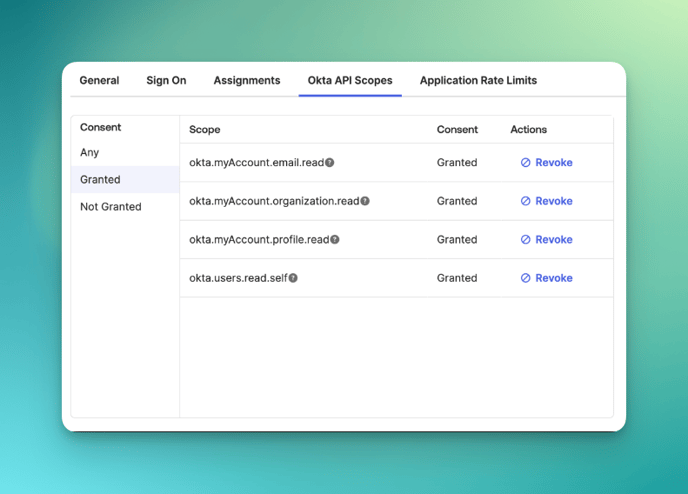
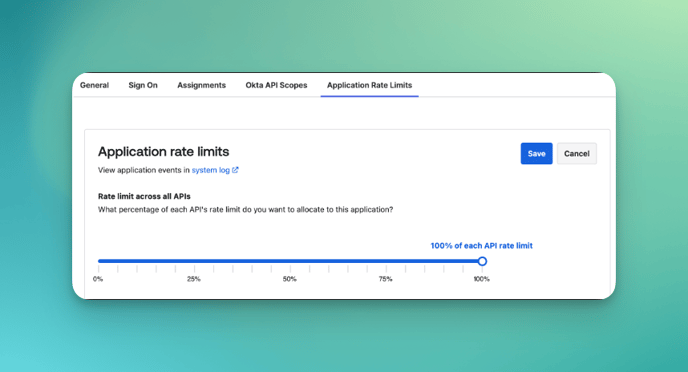
If you anticipate high-volume access (e.g. frequent login to Pult via Okta SSO), consider increasing the Application Rate Limits.
Return to the General tab and copy both the Client ID and Client Secret.
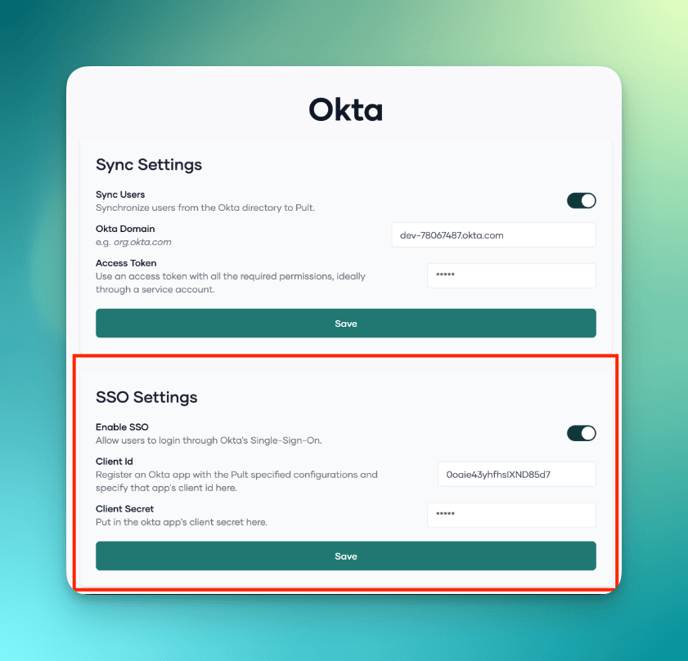
Login to the Pult Dashboard and navigate to Dashboard -> Integrations -> Okta (https://dash.pult.com/organization/integrations/okta)
Paste in the Client ID and Client Secret from the steps before in the SSO Settings section and click Save:
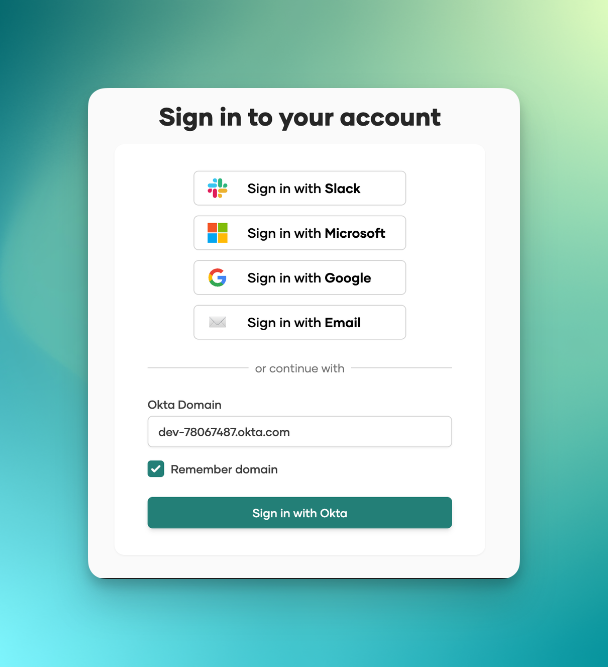
After following these steps, the Okta SSO integration should be fully operational. Users can now sign in by entering their Okta domain on the login page.