Create a floorplan

How to create a floorplan in PULT?

This article will guide you through all the features available in our floor plan builder. From setting up the floor plan to defining policies and restrictions, we have a variety of tools to help you manage and organize your workspace more efficiently.

🪄 To create an office with a floor plan, please check out this article on how to create an office.

Set Desks

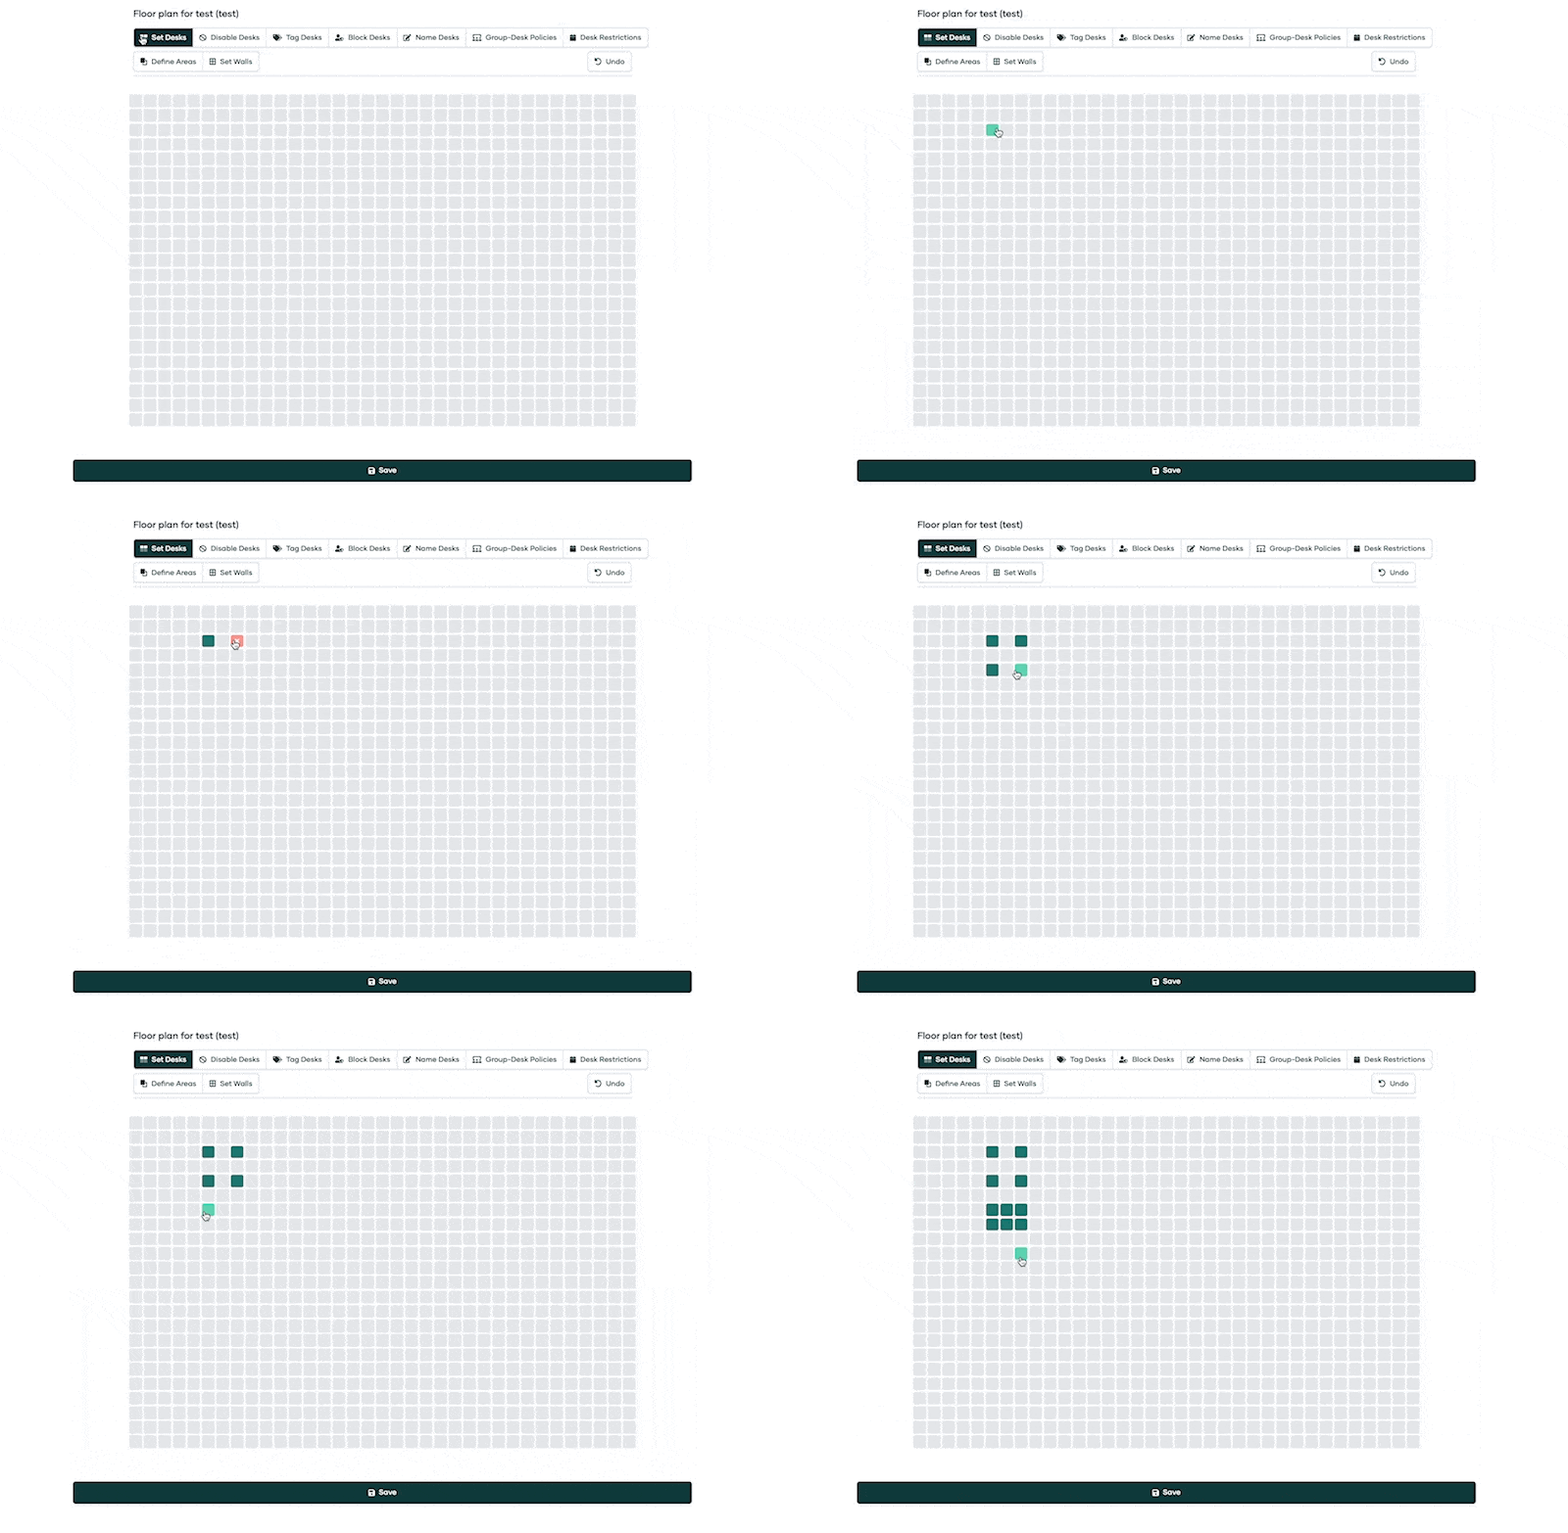
To create an office, first, you need to set the desks. This feature allows you to add desks to your floor plan manually.

Simply click on the 'Set Desks' button, and then click on the location in your floor plan where you want to place the desk. One box = one desk. Hold the left mouse to place multiple desks. To remove desks, simply click on the desk again.
Set or delete Walls

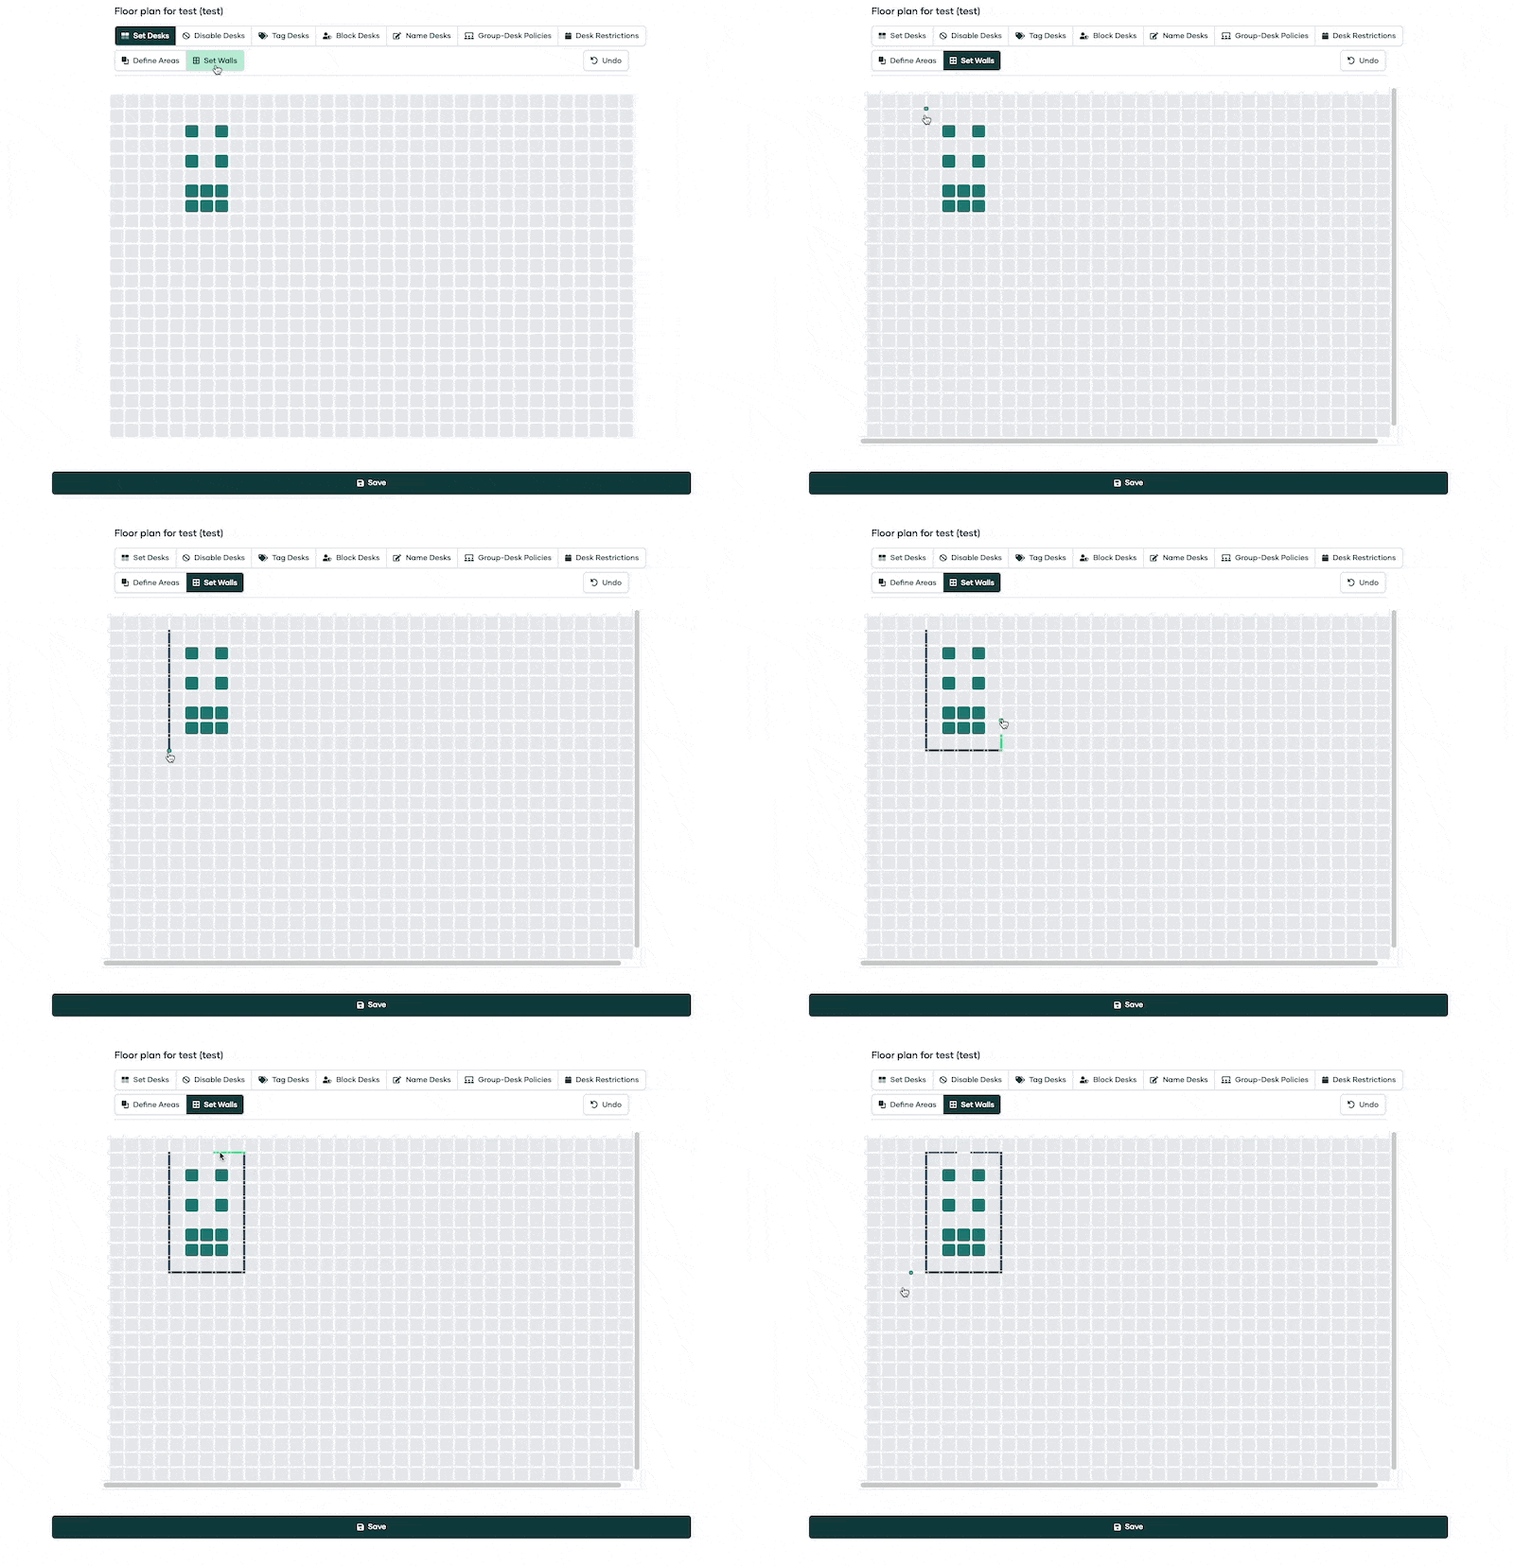
Setting walls can help you represent your actual office layout more accurately in PULT. You can add walls to divide different areas, rooms, or corridors within your office.

Simply click on the 'Set Walls' button, and then click on the location in your floor plan where you want to place a wall and hold your left mouse to drag the wall in any direction. To remove walls, simply click and hold over the wall again.
Define Areas

This feature lets you create specific areas within your floor plan. Areas can be defined for different teams, different functions, or based on any other categorization that suits your organizational needs.

For example, you could define areas for the 'Marketing Team,' 'Quiet Zone,' 'Collaboration Area,' etc.

Disable Desks

If you have a desk that is temporarily not in use or under maintenance, you can disable it. To do this, click on the 'Disable Desks' button and select the desks you want to disable. A disabled desk will not be available for booking or use until you enable it again.

Tag Desks

The 'Tag Desks' feature helps you to categorize and identify desks more easily.

You might tag desks based on their location, size, equipment, or any other characteristic relevant to your organization.

To tag a desk, select it and create the desired tags in the 'Add New Tag' field. After creating a tag, just click on it and select any desk that needs this tag.

Block Desks

If you want to prevent certain desks from being booked by everyone, use the 'Block Desks' feature. This can be useful for (fix-) desks, which should only be bookable by one person.

Name Desks

Naming your desks can be a fun and efficient way to identify them.

You could name them by their:

  • location,

  • their purpose,

  • a number

  • or even with something creative.

Just select a desk and input the desired name in the 'Name' field.

Desk Policies

Our floor plan builder allows you to define policies for groups of desks.

You might create a policy for the 'Sales Area' or the 'Quiet Zone Desks.'

This feature was designed to add policies to desk(s) that are only bookable for one or more team(s) on selected days

You can also add individual users to the Desk Policies, for example if you only want to grant access to selected members of a team and not the entire team.

Tipp: If you have 'Team Days' (e.g. for the Sales team every Thursday) this feature helps you set this up.


Desk Restrictions

For certain situations, you may want to restrict everyone from booking a desk. With the 'Desk Restrictions' feature, you can set restrictions based on time of use, duration of use, etc. -
Use-Case: If you have a company event two weeks from you, you may want to block some or all desks for this day.

If you need any more help, please reach out to our support team.