How to Invite Visitors in PULT
Last updated: August 12, 2026
This guide explains how to invite visitors through the PULT app or dashboard.
Step 1: Open the Invitation
You can access the visitor invitation in two ways:
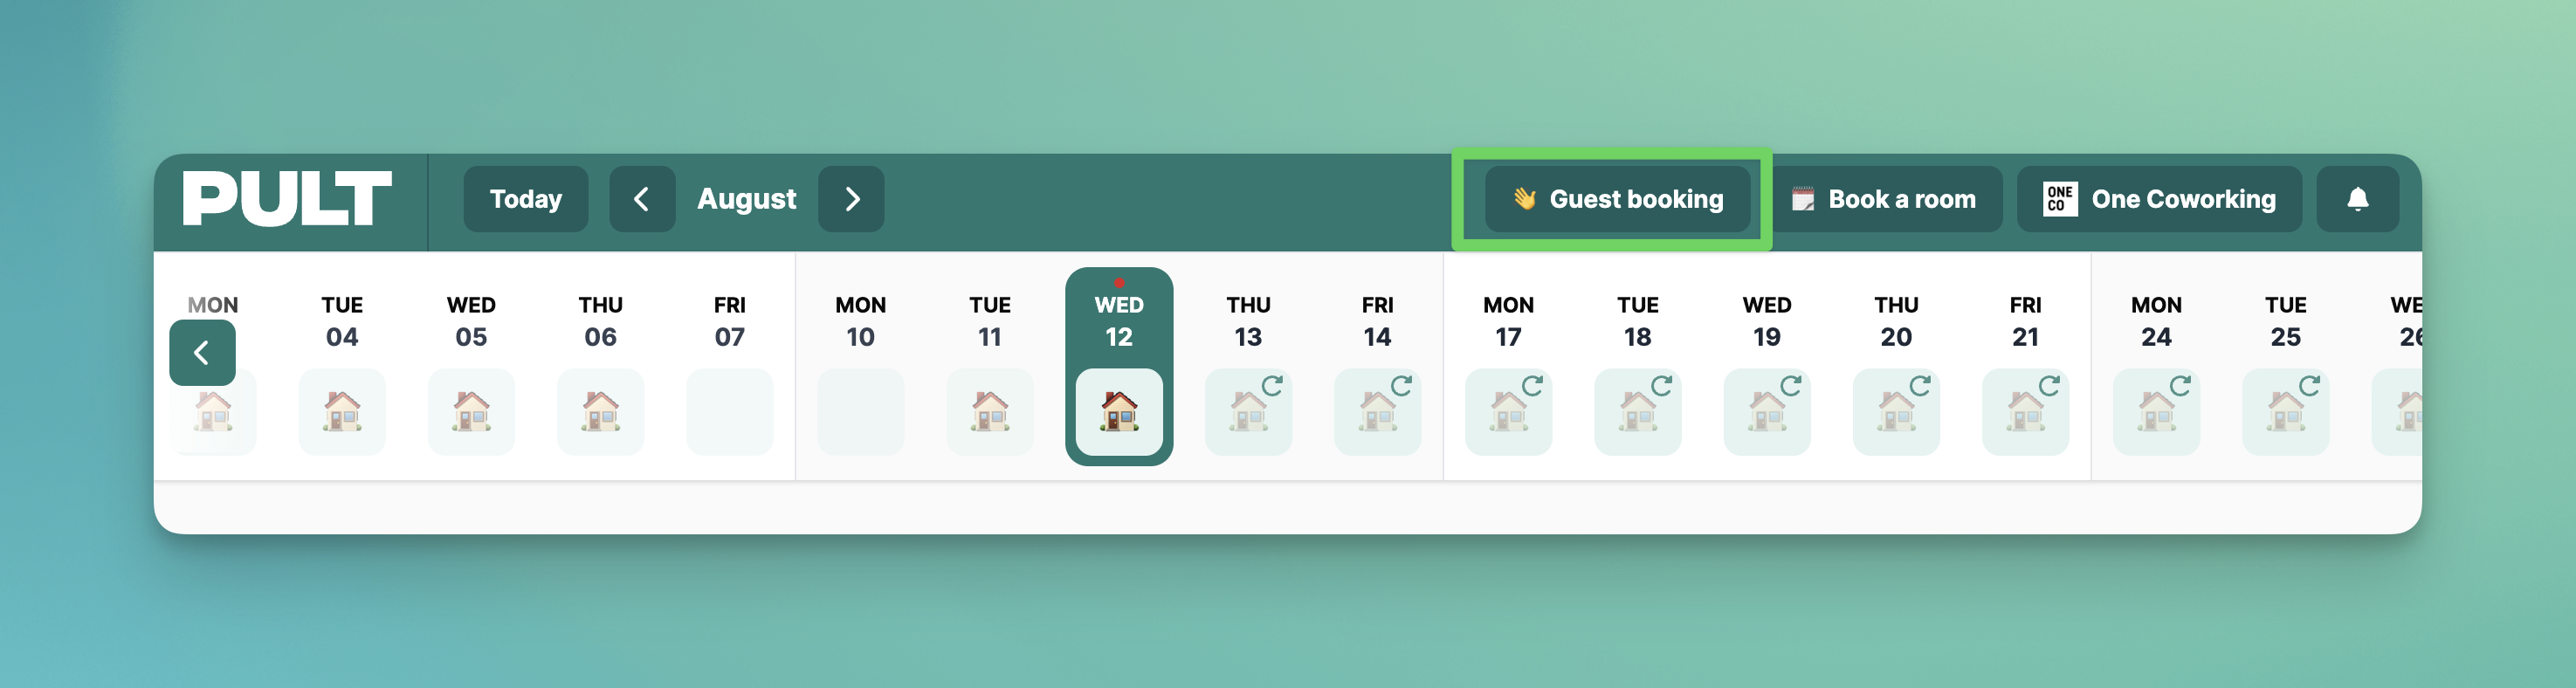
In the app: go to Guest Booking and tap "+ Invite Visitor"
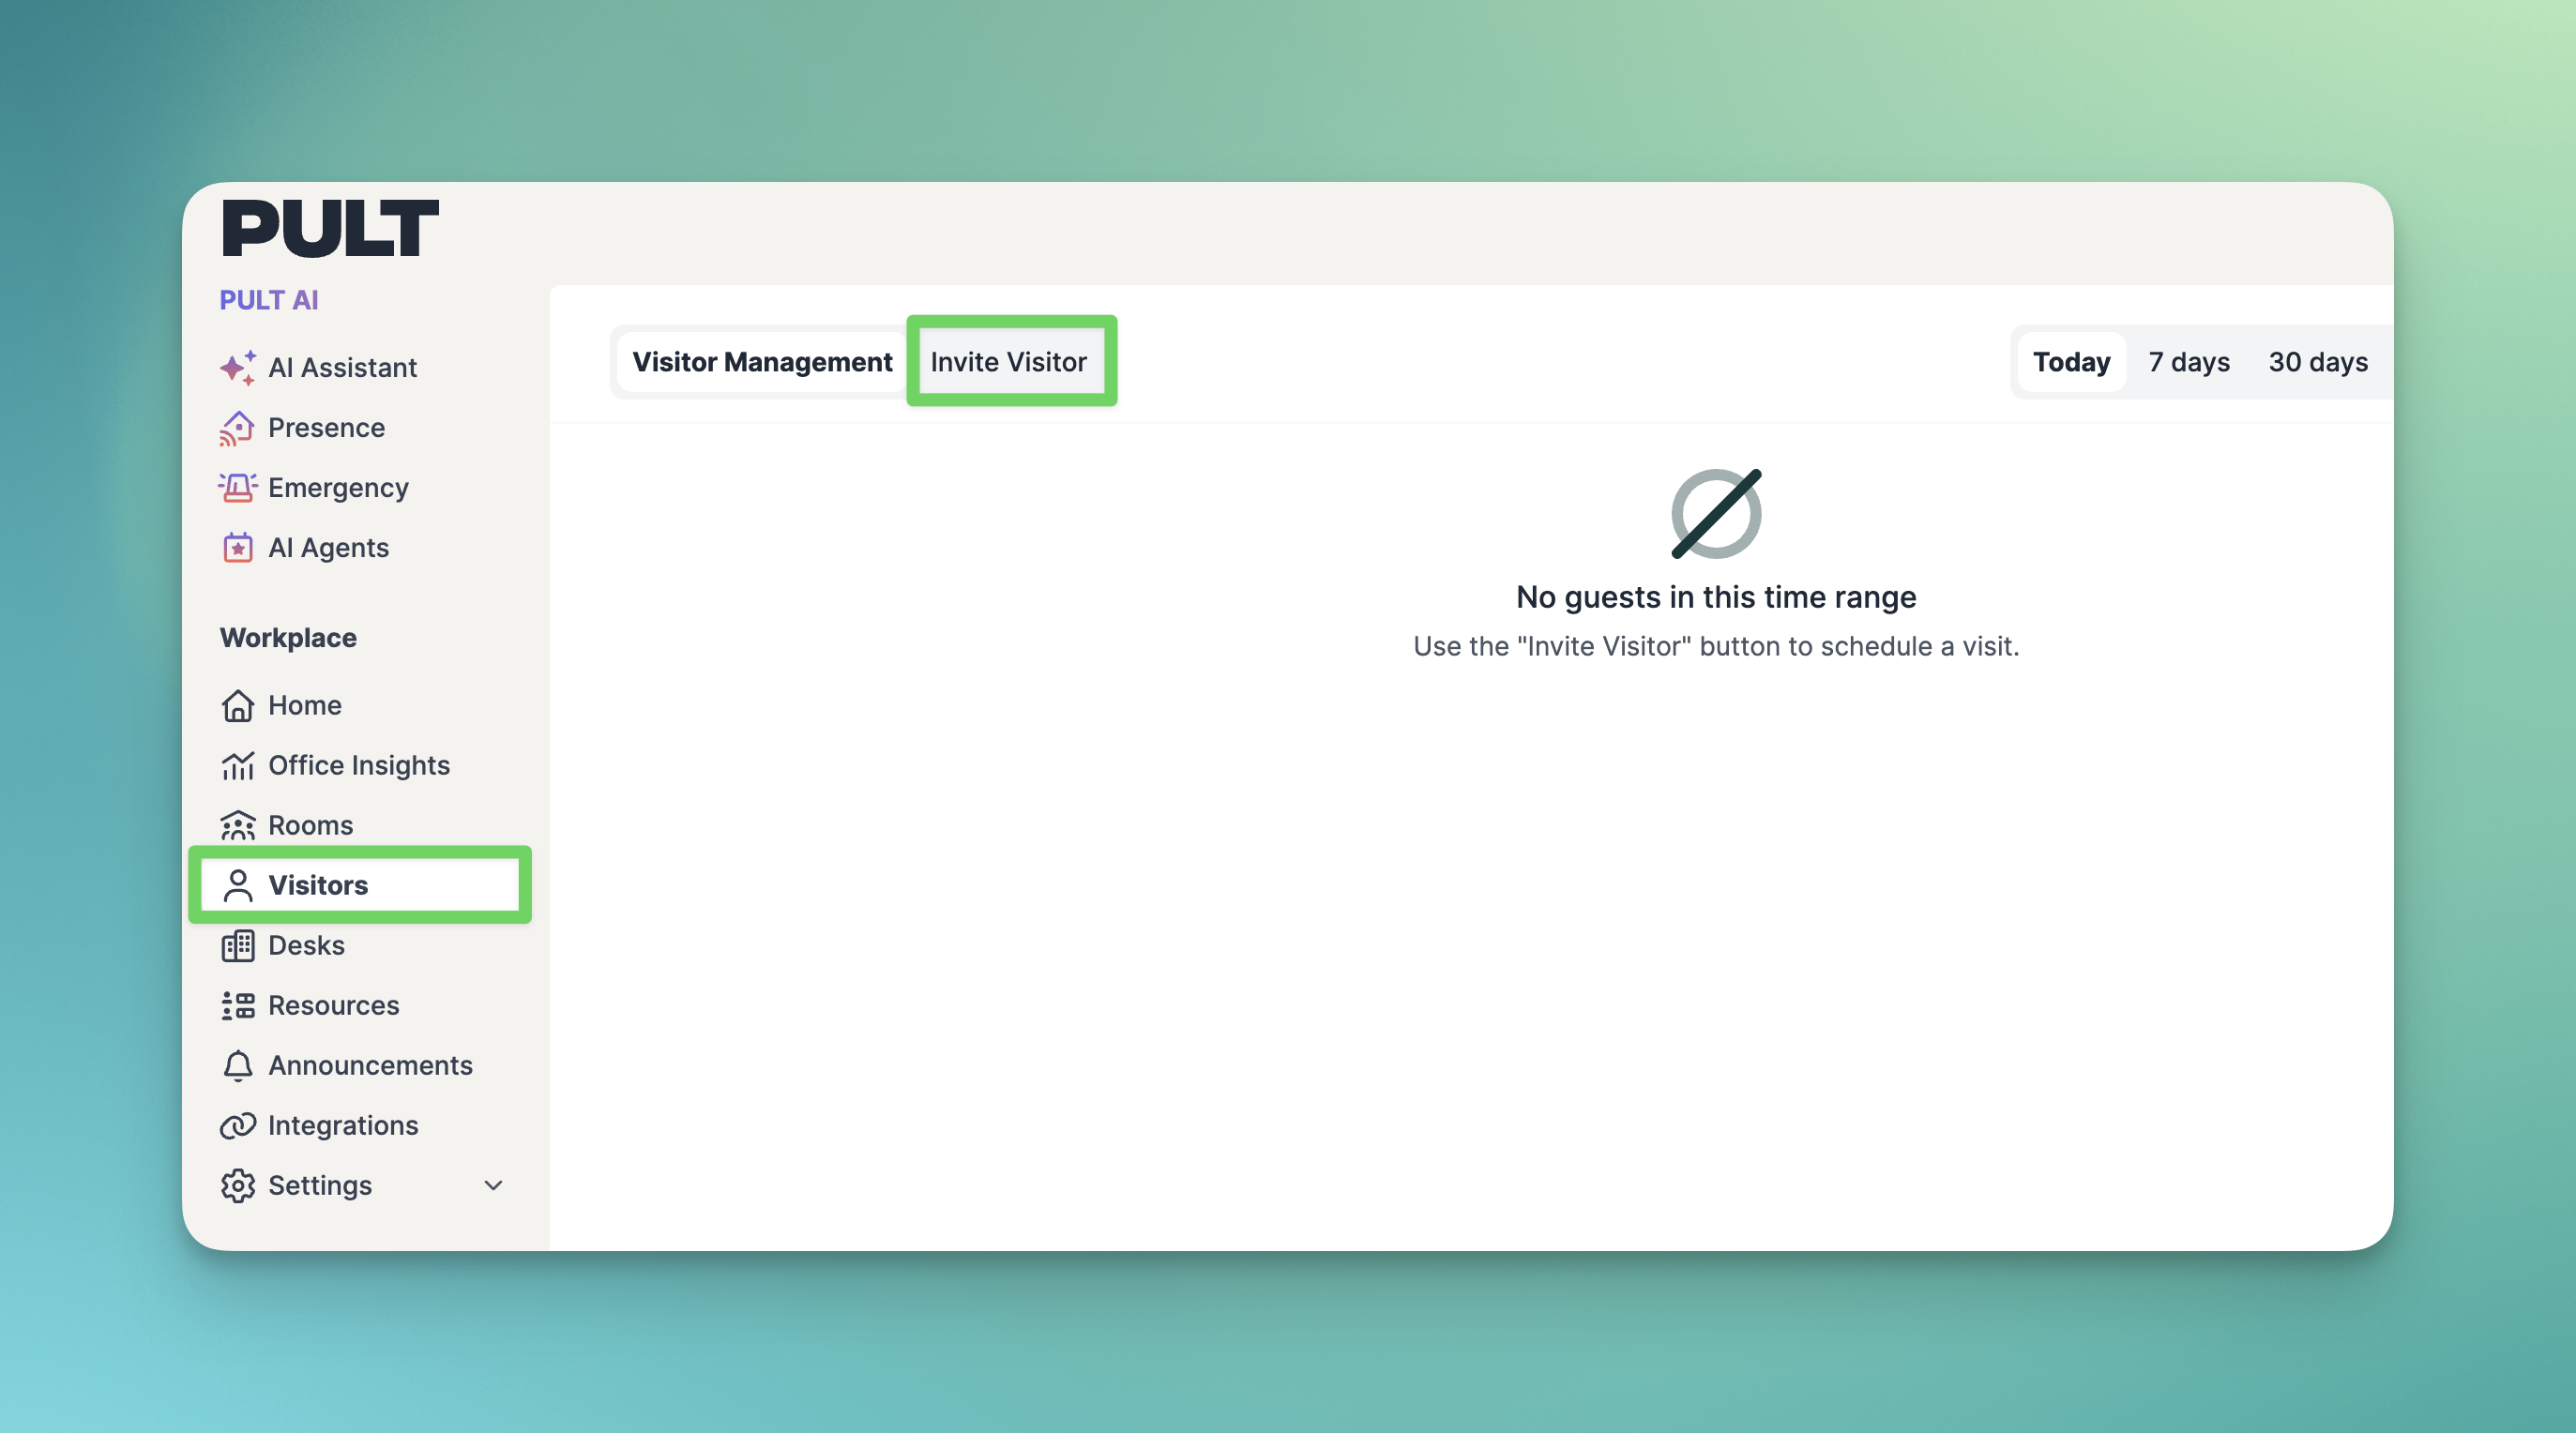
In the dashboard: go to Visitors and click "Invite Visitor"
The invitation form will open automatically.
Step 2: Fill in Visitor Information
In the invitation form, you can add all relevant visitor details. This information is also used for badge printing if enabled.
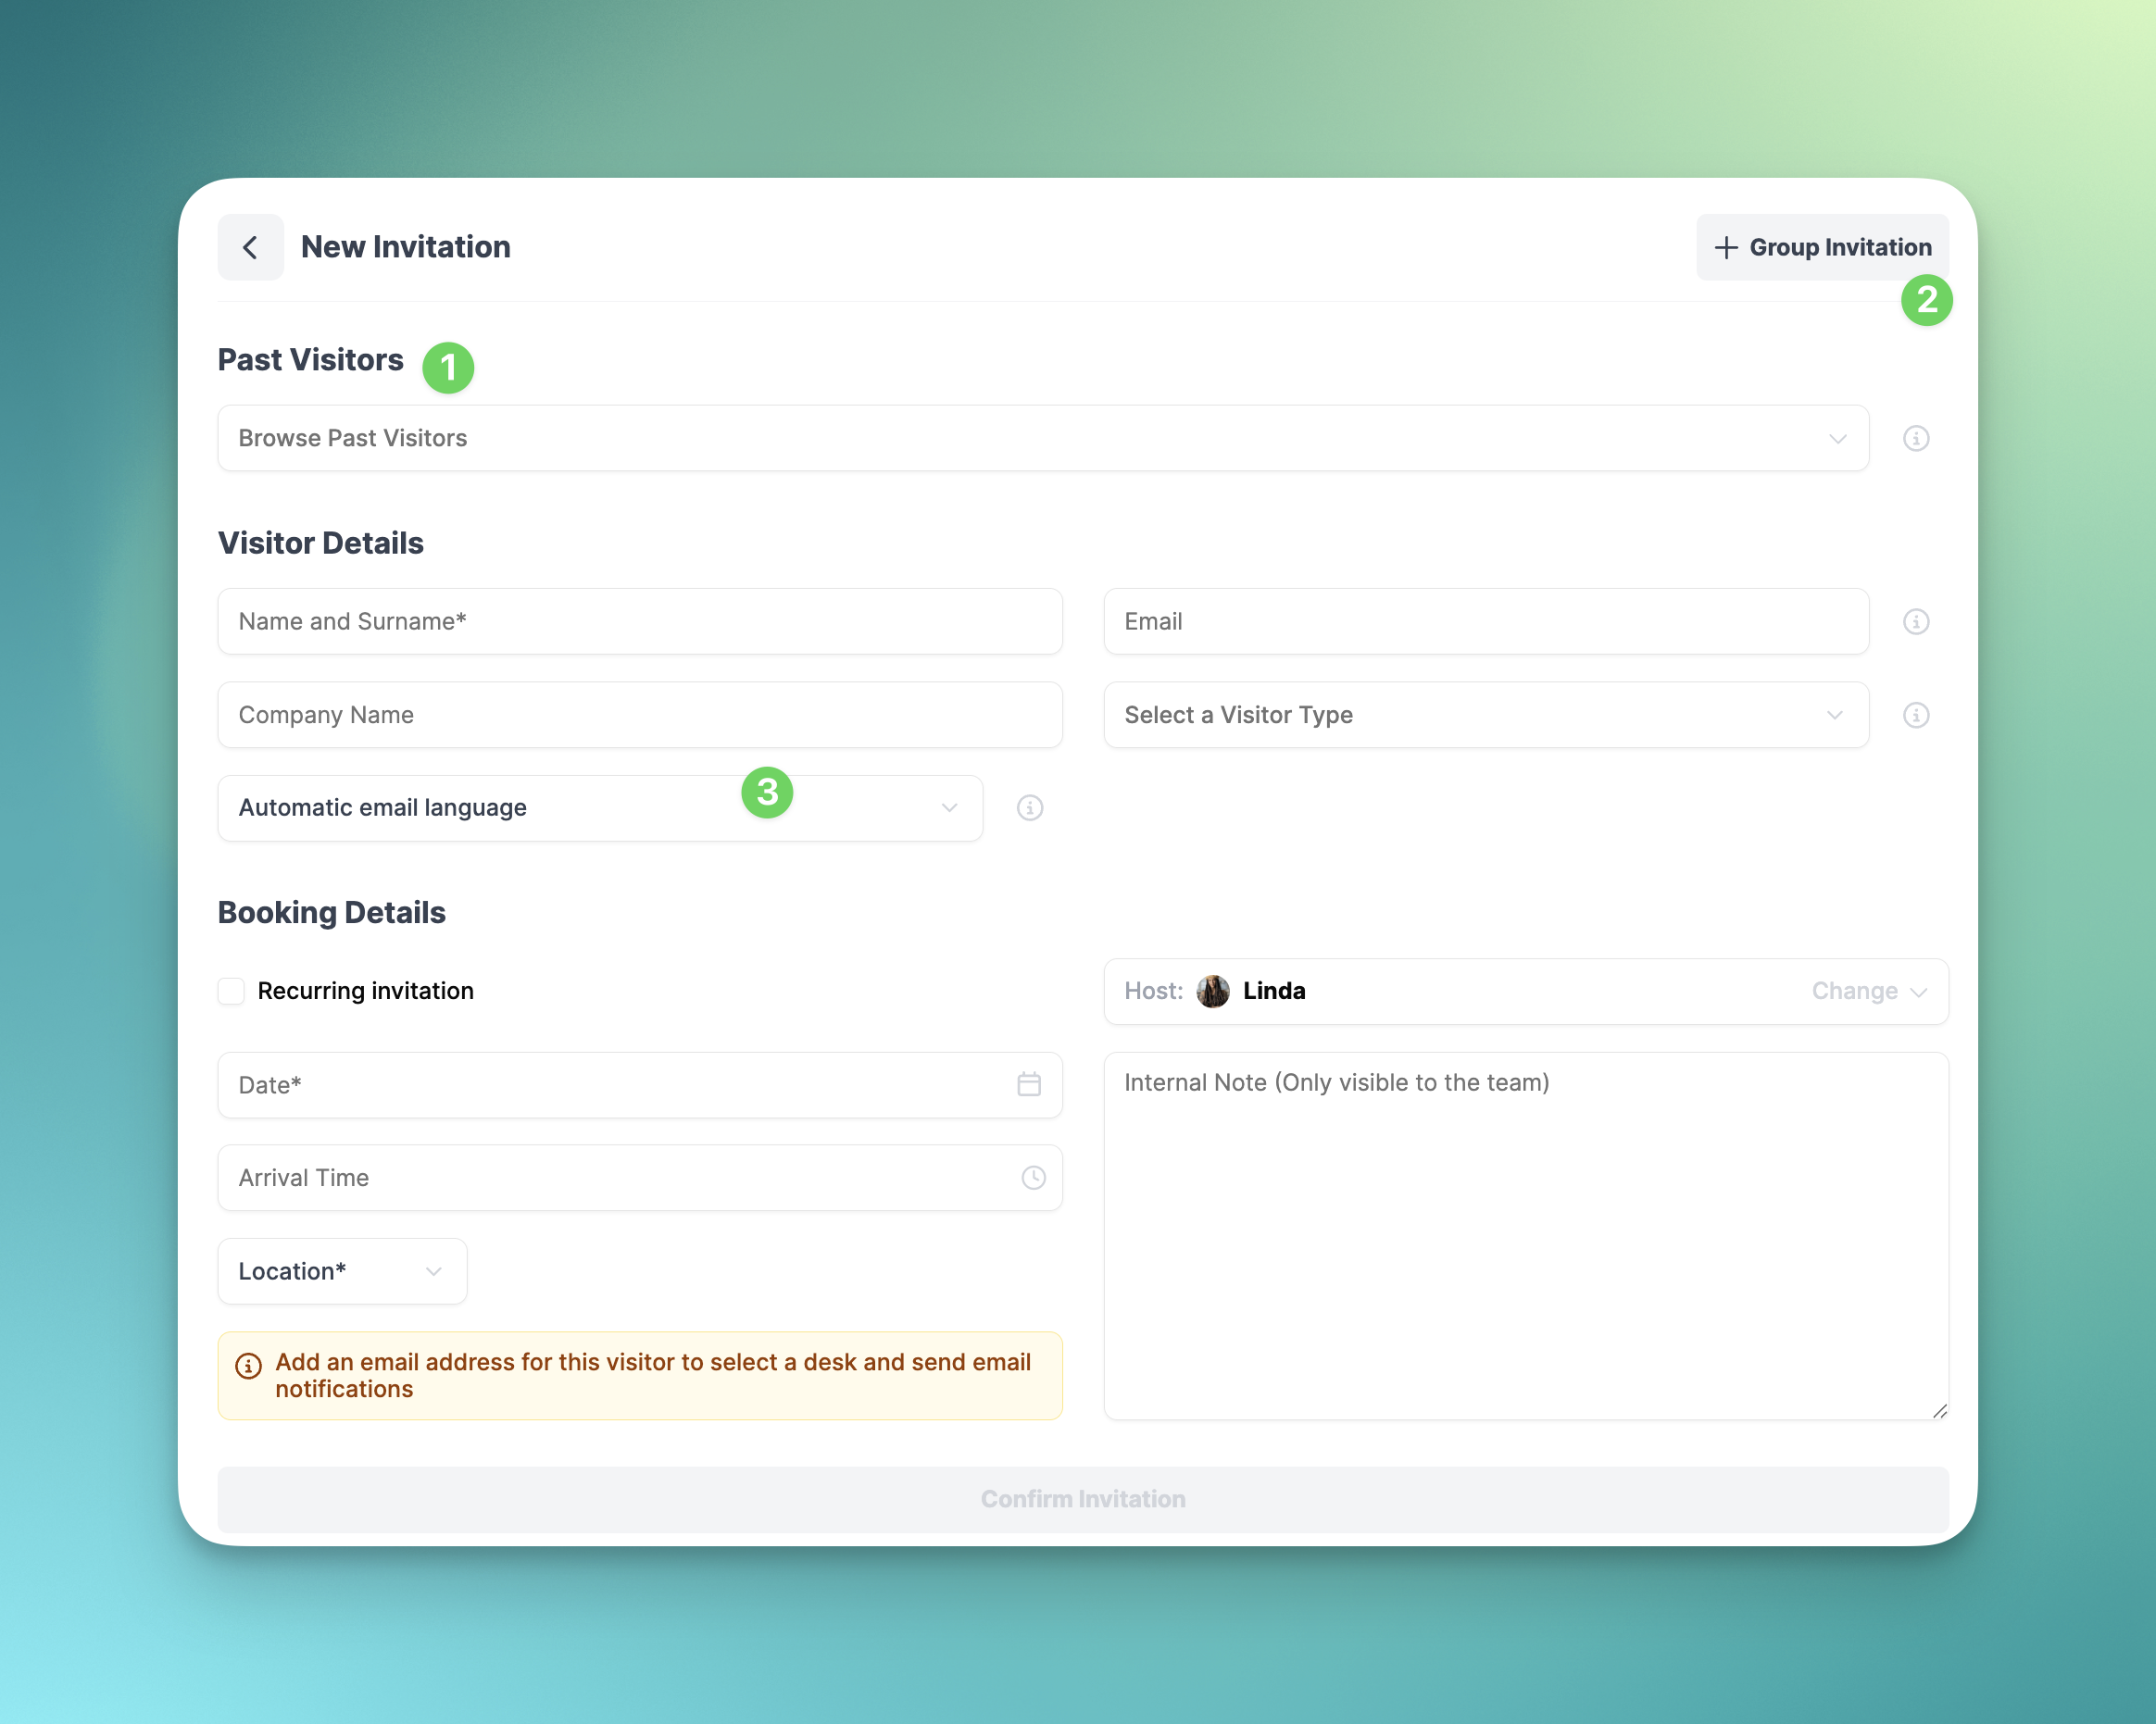
Additional options:
Past visitors: Use the past visitor field to search for and select a previous visitor - the system will automatically fill in their details.
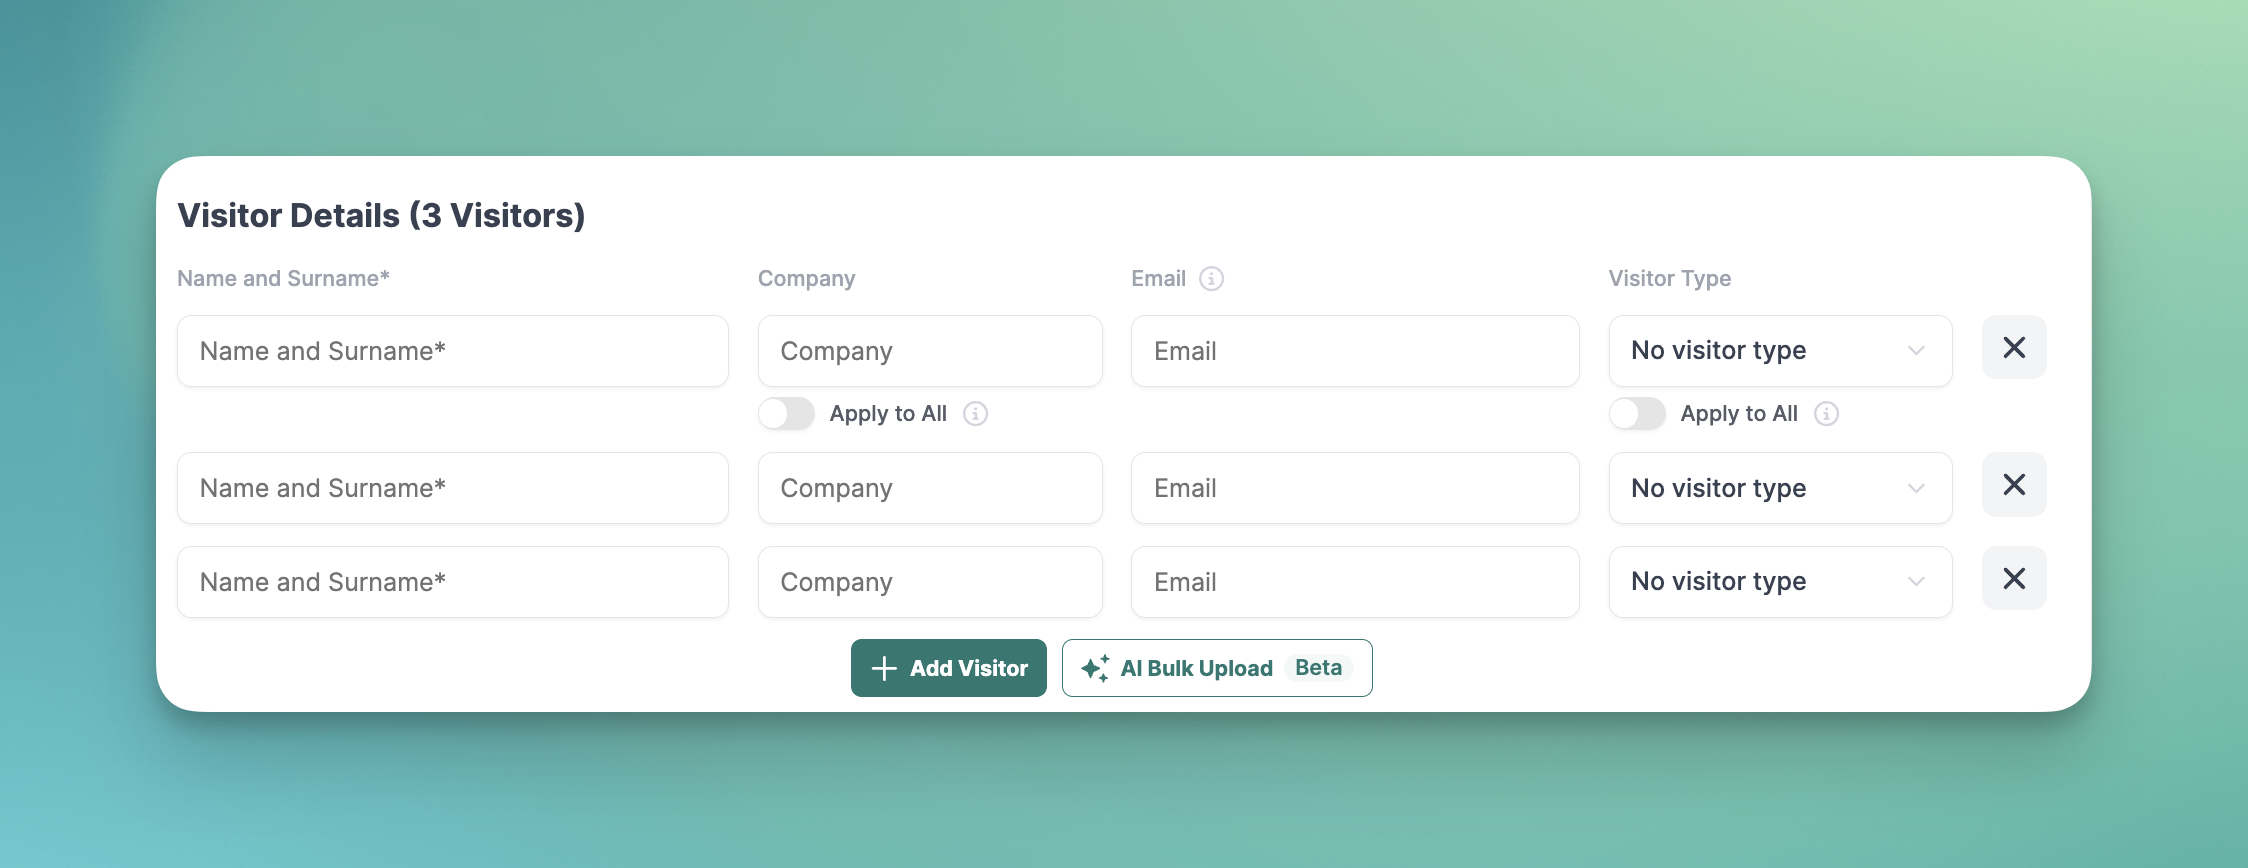
Group invitations: When inviting multiple visitors at once, you can choose whether shared details (such as company or visitor type) should apply to all guests in the group.
Email language: You can select the language in which the invitation email will be sent to the visitor.
Upload a list: If clicking on the group invitation, you can upload a document in list format to the AI Agent, which will automatically extract the visitor data and fill in the correct fields.
Step 3: Booking Details
In the booking details section, you can configure the following:
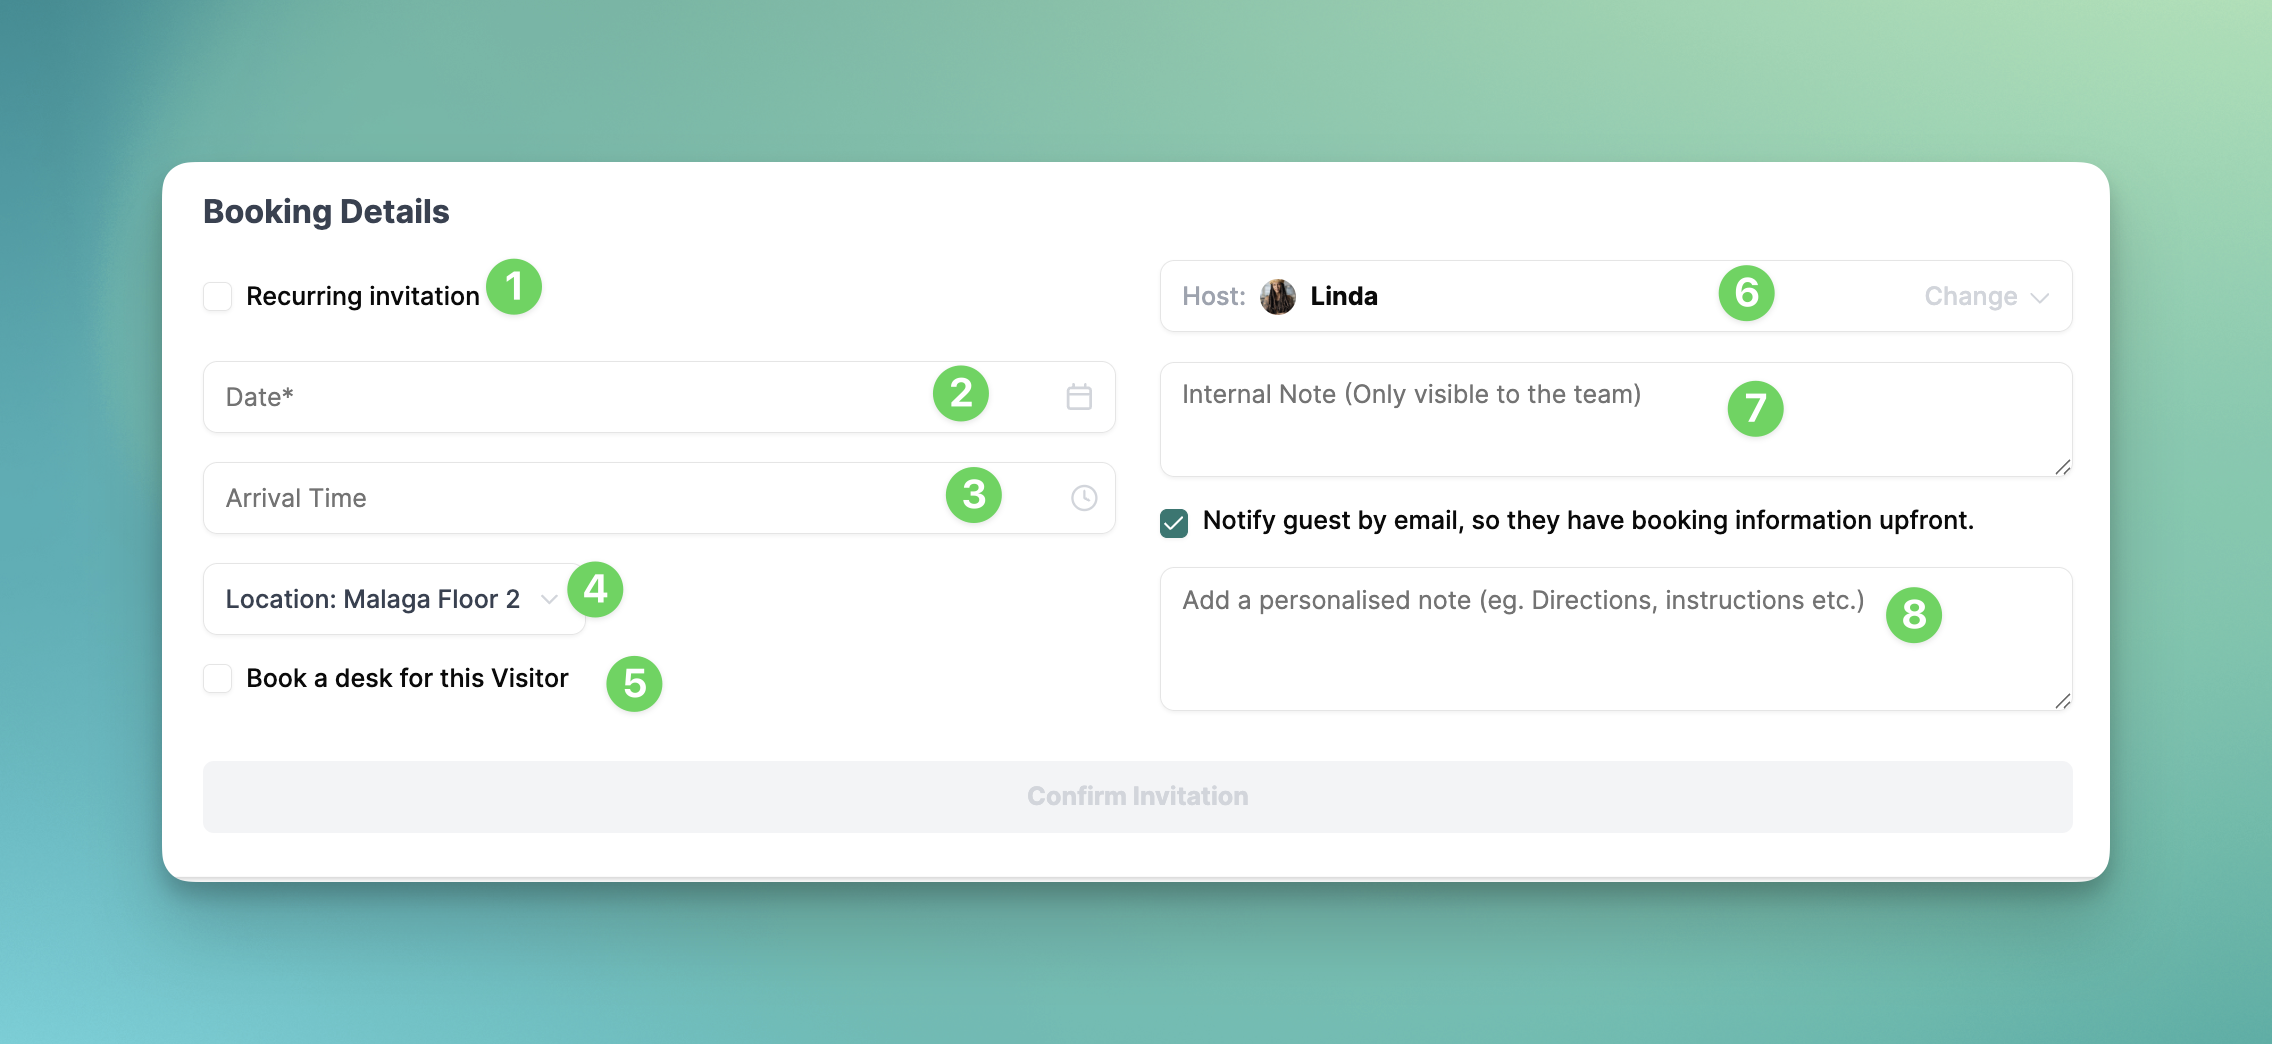
Recurring invitation: Select this option for visitors who come regularly
Date: The date of the visit
Arrival time: The expected arrival time (no end time needed — this is tracked automatically via the check-out timestamp)
Location: The office location for the visit
Seat booking: If the visitor has an email address, you can also reserve a desk for them
Host: Select the host, who will be notified via Teams, Slack, or Google Chat when the visitor checks in
Internal note: Visible in the dashboard for internal reference only
Note to visitor: Added to the automated invitation email sent to the visitor
If you have any questions, don't hesitate to reach out to our support team.