Visitor Styling: Email Logo and Kiosk Colors
Last updated: November 10, 2026
This article shows admins how to add your own logo to visitor emails and choose the colors of your kiosks.
Email logo
In the PULT dashboard, go to Settings → Visitors → Styling.
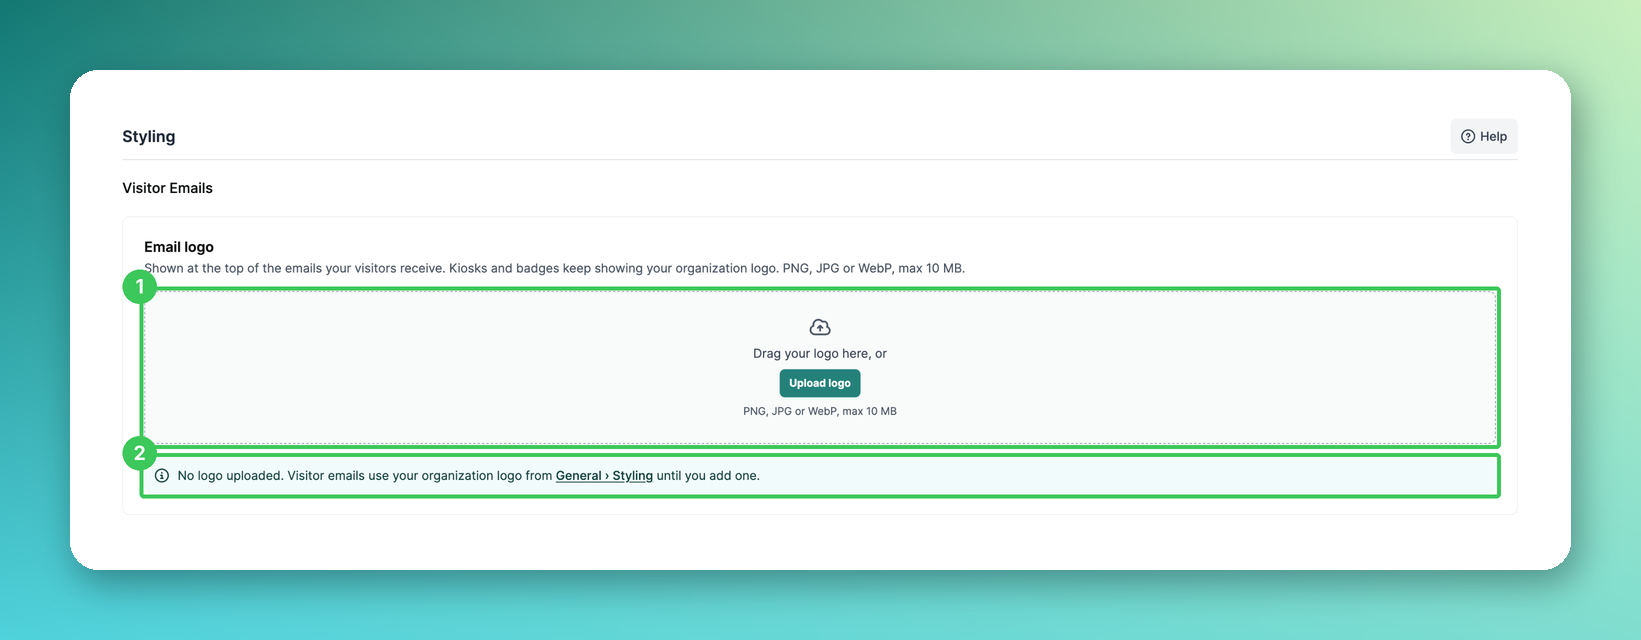
1. Upload logo
Drag your logo into the box or click Upload logo (PNG, JPG or WebP, max. 10 MB). It is shown at the top of the emails your visitors receive. Kiosks and badges keep showing your organization logo.
2. Organization logo as fallback
As long as you haven’t uploaded a logo, visitor emails use your organization logo from General → Styling.
Kiosk colors
Scroll down to Kiosk Appearance.
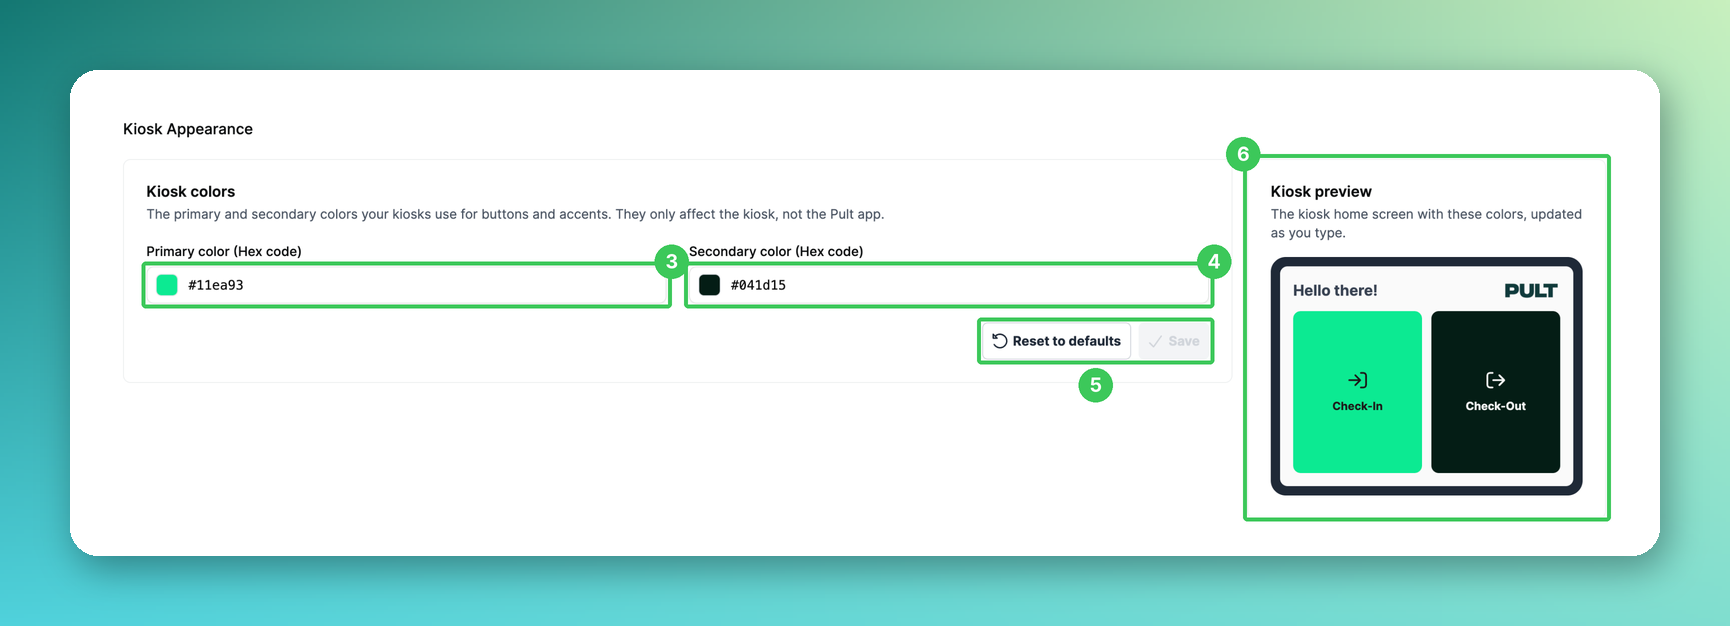
3. Primary color
Enter the hex code of the main color your kiosks use for buttons and accents, e.g. the check-in button.
4. Secondary color
Enter the hex code of the second color, e.g. for the check-out button.
5. Reset to defaults / Save
Click Save to apply the colors to all kiosks. Reset to defaults restores the PULT colors.
6. Kiosk preview
Shows the kiosk home screen with your colors, updated as you type.
Frequently asked questions
Do the kiosk colors change the PULT app?
No. They only apply to your kiosks.
Can each kiosk have its own background?
Yes. The background image is set per kiosk in the kiosk settings, while logo and colors apply to all kiosks (see Kiosk device settings).
Where did the kiosk colors used to be?
Under Settings → Visitors → General. They now live on the Styling page.
Where do I preview the visitor emails?
Under Settings → Visitors → Visitor emails (see Visitor Email Preview).
Related articles
If you have any questions, feel free to contact our support team at support@pult.com.